最近又有闲空继续完成我的浮墨笔记了,今天把后台登录注册写了一下,用了传统的token登录!
参考这篇文档:
安全 (nestjs.cn)
英文版实在是看不懂,网上又全都是二手知识,感谢为Nestjs添砖加瓦的大佬们!
本文不具备学习参考价值,仅仅个人项目经验总结!
JWT 验证过程
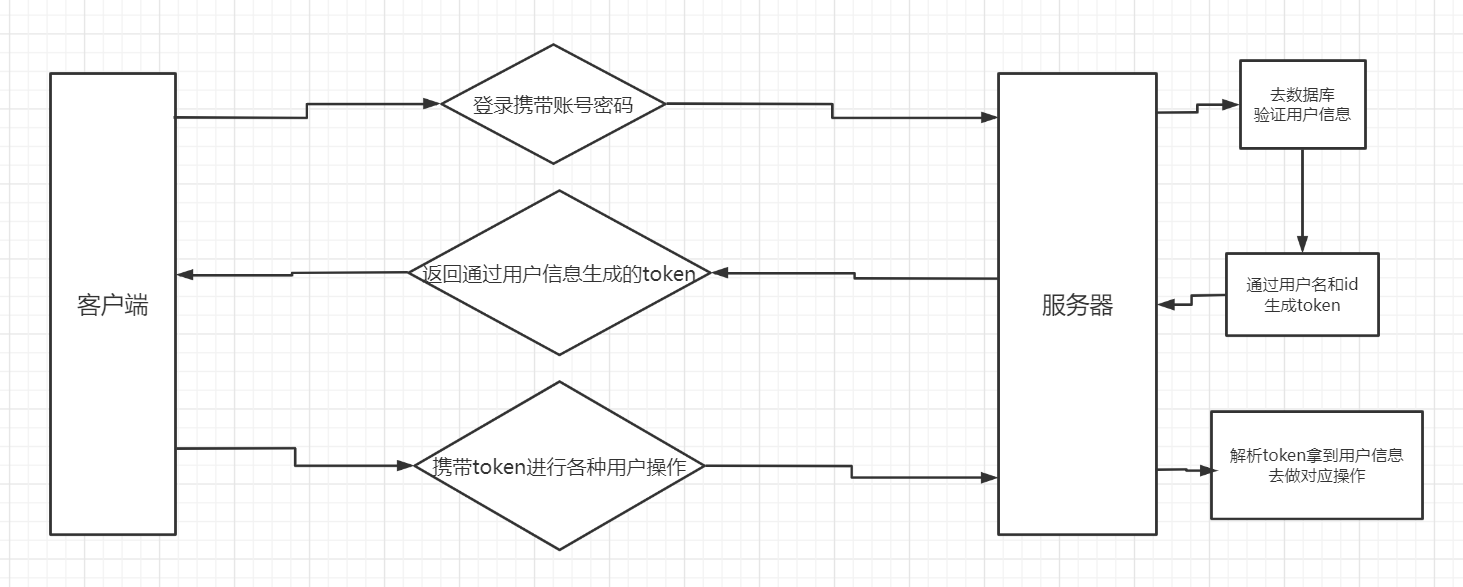
下面是我在ProcessOn上面简单的画了点图,其中一些细节被我省去了,大致是这样的:
![image-20220520064340254 image]()
客户端完成前端页面的检查无误后,向后端发送携带账号密码的请求,后端收到后去数据库查一下存不存在该用户,若存在则为该用户信息生成token,返回给前端,这时前端即可将token放在需要验证用户信息的API的请求头中,当用户请求需要验证用户信息的API时,该API首先将token解析出来,这其中包括验证token合法性、有效期等等,jwt是可逆的,解析后会还原出原信息,得到用户信息后即可作为操作数据库中该用户的条件。
这其中有私钥是在后端,后端通过私钥和载荷生成token,验证时后端通过私钥和token进行解析。
Nestjs 中的验证过程
一些模块为繁琐的验证过程提供了优雅的解决方案,在Nestjs中,我们可以通过文档中所给的Passport来将流程简化,该模块可以自定义策略,以实现自定义验证,像是设计模式中的模板模式,一些方法已经写好了,你可以选择性的覆盖。
新建 auth 模块
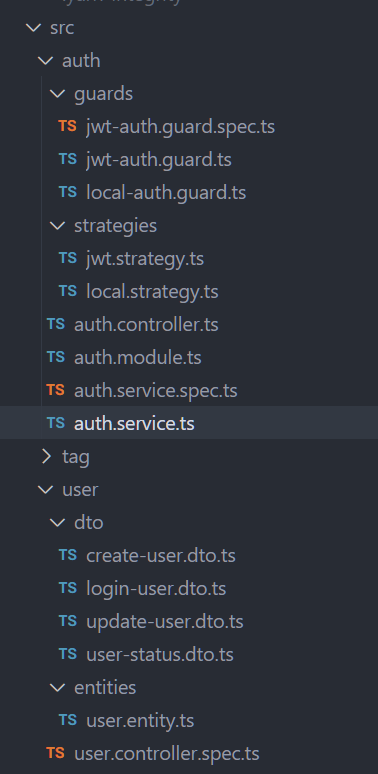
首先划分区块,验证权限和单纯地获取用户信息这两个板块应该是放在不同的module里,而不是一股脑写在user里,所以我将auth单独抽离出来。
这是我的目录结构:
![image-20220520070828059 image]()
创建 Token
在auth.controller.ts中添加login接口,在进入login控制层之前,有Passport插件为我们验证好了用户信息,可以直接从request中获取。
1
2
3
4
5
6
7
8
9
10
11
12
13
14
15
16
17
18
19
20
21
22
23
24
25
26
27
28
29
30
31
32
33
34
35
36
37
38
39
40
41
42
43
44
45
| import { JwtAuthGuard } from './guards/jwt-auth.guard';
import { UserStatusDTO } from './../user/dto/user-status.dto';
import { LocalAuthGuard } from './guards/local-auth.guard';
import { AuthService } from './auth.service';
import {
Controller,
Get,
Post,
Body,
BadRequestException,
UseGuards,
Req,
} from '@nestjs/common';
import { Request } from 'express';
declare module 'express' {
interface Request {
user: UserStatusDTO;
}
}
@Controller('auth')
export class AuthController {
constructor(private readonly authService: AuthService) {}
@UseGuards(LocalAuthGuard)
@Post('login')
login(@Req() req: Request) {
try {
return this.authService.login(req.user);
} catch (error) {
throw new BadRequestException(error.message);
}
}
@UseGuards(JwtAuthGuard)
@Get('profile')
me(@Req() req: Request) {
return req.user;
}
}
|
在auth.service.ts中,login方法创建token后返回,简单直接,这里的JwtService和userService通过声明依赖注入进来,具体看auth.module.ts
1
2
3
4
5
6
7
8
9
10
11
12
13
14
15
16
17
18
19
20
21
22
23
24
25
26
27
28
29
30
31
32
33
34
35
36
37
38
39
40
41
42
43
44
45
46
47
48
49
50
51
52
53
54
55
56
57
58
59
60
61
62
| import { UserStatusDTO } from './../user/dto/user-status.dto';
import { BadRequestException, Injectable } from '@nestjs/common';
import { JwtService } from '@nestjs/jwt';
import { LoginUserDto } from '@user/dto/login-user.dto';
import { UserService } from '@user/user.service';
import * as _ from 'lodash';
import * as bcrypt from 'bcryptjs';
@Injectable()
export class AuthService {
constructor(
private userService: UserService,
private jwtService: JwtService,
) {}
async validateUser(loginUserDto: LoginUserDto): Promise<UserStatusDTO> {
const username = loginUserDto.username;
const password = loginUserDto.password;
if (_.isEmpty(username) || _.isEmpty(password)) {
throw new BadRequestException('user is required!');
}
const user = await this.userService.findLoginUser(username);
if (_.isEmpty(user)) {
throw new BadRequestException('user not found!');
}
const isValidPwd = await bcrypt.compare(password, user.password);
if (!isValidPwd) {
throw new BadRequestException('password is not valid!');
}
const sanitizedUser = {
id: user.id,
username: user.username,
memo_count: user.memo_count,
day_count: user.day_count,
tag_count: user.tag_count,
month_sign_id: user.month_sign_id,
last_login: user.last_login,
};
return sanitizedUser;
}
async login(userInfo: UserStatusDTO) {
const token = this.createToken(userInfo);
return {
userInfo,
...token,
};
}
createToken({ username, id: userId }: UserStatusDTO) {
const token = this.jwtService.sign({ username, userId });
const expires = process.env.expiresTime;
return {
token,
expires,
};
}
}
|
在auth.module.ts中,注入其依赖的模块
1
2
3
4
5
6
7
8
9
10
11
12
13
14
15
16
17
18
19
20
21
22
23
| import { JwtStrategy } from './strategies/jwt.strategy';
import { LocalStrategy } from './strategies/local.strategy';
import { Module } from '@nestjs/common';
import { AuthService } from './auth.service';
import { JwtModule } from '@nestjs/jwt';
import { PassportModule } from '@nestjs/passport';
import { UserModule } from '@user/user.module';
import { AuthController } from './auth.controller';
@Module({
imports: [
UserModule,
PassportModule,
JwtModule.register({
secret: '123',
signOptions: { expiresIn: '24h' },
}),
],
controllers: [AuthController],
providers: [AuthService, LocalStrategy, JwtStrategy],
exports: [AuthService],
})
export class AuthModule {}
|
在local.strategy.ts中,我们要验证用户信息的合法性,passport-local是用来验证用户信息的策略。
1
2
3
4
5
6
7
8
9
10
11
12
13
14
15
16
17
18
19
20
21
| import { AuthService } from '@auth/auth.service';
import { Strategy } from 'passport-local';
import { PassportStrategy } from '@nestjs/passport';
import { Injectable, UnauthorizedException } from '@nestjs/common';
@Injectable()
export class LocalStrategy extends PassportStrategy(Strategy) {
constructor(private readonly authService: AuthService) {
super();
}
async validate(username: string, password: string) {
const user = await this.authService.validateUser({ username, password });
if (!user) {
throw new UnauthorizedException();
}
return user;
}
}
|
为了让策略生效,我们需要添加guard,在guards/local-auth.guard.ts
1
2
3
4
5
| import { AuthGuard } from '@nestjs/passport';
import { CanActivate, ExecutionContext, Injectable } from '@nestjs/common';
import { Observable } from 'rxjs';
@Injectable()
export class LocalAuthGuard extends AuthGuard('local') {}
|
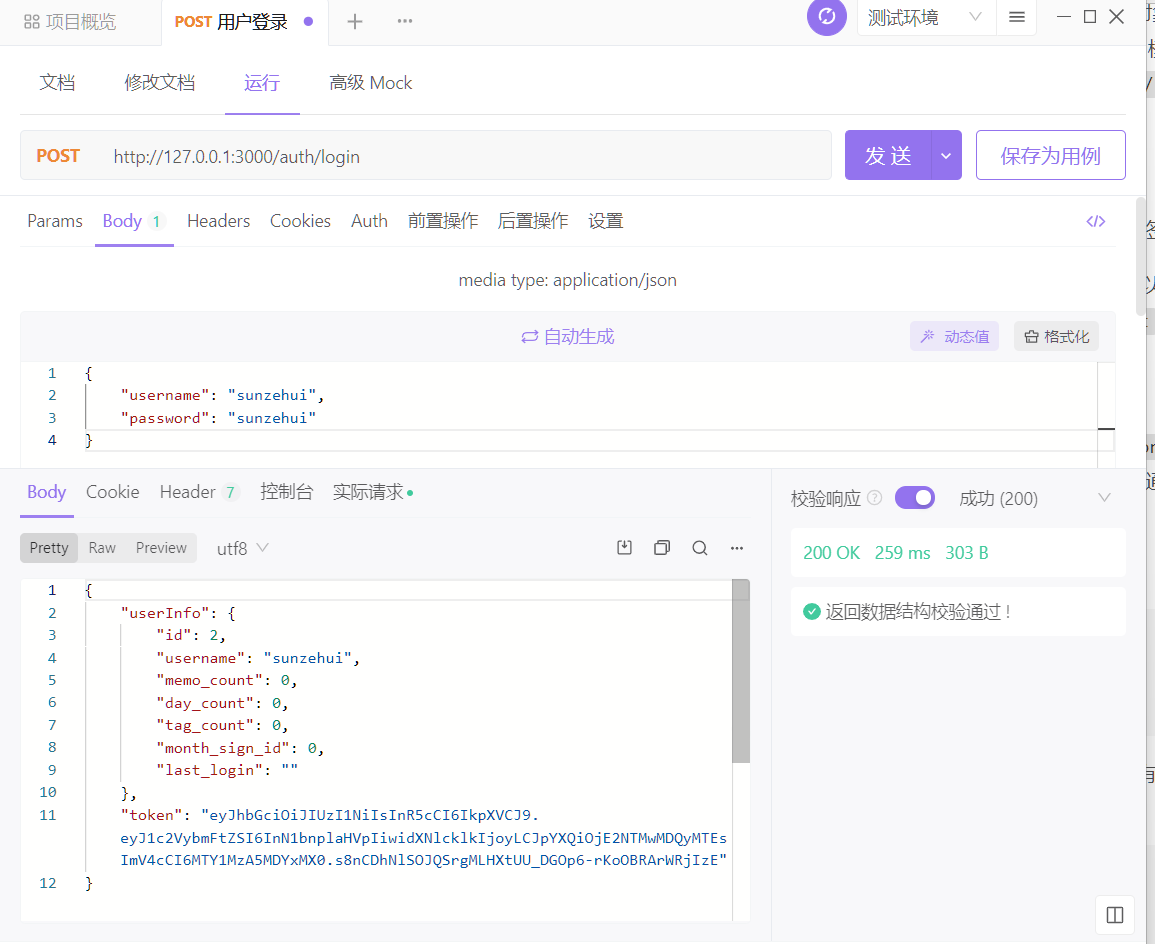
这样,一个登录接口就写好了,如果密码正确,便会返回token和简短的用户信息:
![image-20220520075026600 image]()
为需要验证用户信息的接口添加解析
比如之前auth.controller.ts中的profile接口:
1
2
3
4
5
6
7
8
9
10
11
12
13
14
15
16
17
18
19
| import { JwtAuthGuard } from './guards/jwt-auth.guard';
import { UserStatusDTO } from '@user/dto/user-status.dto';
import { LocalAuthGuard } from './guards/local-auth.guard';
import { AuthService } from './auth.service';
@Controller('auth')
export class AuthController {
constructor(private readonly authService: AuthService) {}
@UseGuards(JwtAuthGuard)
@Get('profile')
me(@Req() req: Request) {
return req.user;
}
}
|
使用路由守卫JwtAuthGuard,这个是jwt策略,这个策略已经实现对token的验证和解析,如果有一环出错会直接返回异常,不需要我们编写验证逻辑。在strategy/jwt.strategy.ts:
1
2
3
4
5
6
7
8
9
10
11
12
13
14
15
16
17
18
19
20
21
| import { Injectable, UnauthorizedException } from '@nestjs/common';
import { PassportStrategy } from '@nestjs/passport';
import { ExtractJwt, Strategy } from 'passport-jwt';
import { UserService } from '../../user/user.service';
@Injectable()
export class JwtStrategy extends PassportStrategy(Strategy) {
constructor() {
super({
jwtFromRequest: ExtractJwt.fromAuthHeaderAsBearerToken(),
ignoreExpiration: false,
secretOrKey: '123',
});
}
async validate(payload: any) {
return payload;
}
}
|
同样,添加到路由守卫中,在guards/jwt-auth.guard.ts:
1
2
3
4
5
| import { AuthGuard } from '@nestjs/passport';
import { CanActivate, ExecutionContext, Injectable } from '@nestjs/common';
import { Observable } from 'rxjs';
@Injectable()
export class JwtAuthGuard extends AuthGuard('jwt') {}
|
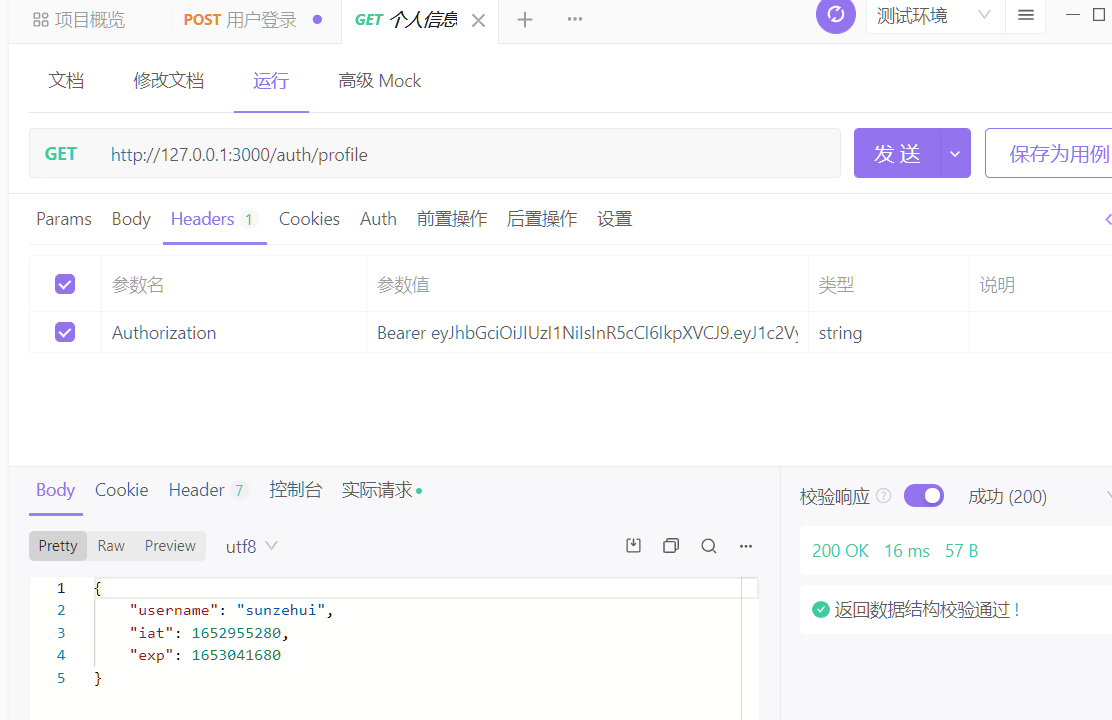
这样,验证jwt的操作也就完成了
![image-20220520075924234 image]()
总结
刚看可能会很懵,如果直接手写倒也没这么多事,不得不说Nestjs不愧是个框架,强制让我用洋葱皮,模块化的方式写业务代码,可维护性和健壮性自然不必多说,又用了一些快速开发jwt验证的模块,我整个登录写下来基本可以说不用关心token的处理逻辑,总之体验很棒,除了有点费眼,来回找文件。。。


