最近做了个大屏项目,分析一下常见的适配方案。
为什么要适配?
因为屏幕宽度都不一致,为了尽量页面布局合理,字体展示清晰,这里需要使用《响应式布局》
使用 vw/vh
vw 是指把当前屏幕宽度切分成100份,每份1个vw
vh 是指把当前屏幕高度切分成100份,每份1个vh
例如展示一张图片,既不能太宽也不能太窄,保持比例缩放,一般都是按屏幕宽度定宽
宽高写vw即可。
使用 rem
用到了这个特性:
rem 代表相对于根元素字体大小的单位,1个rem等于1个字体大小
只要通过js根据屏幕动态设置了根元素的字体大小,那么rem对应的大小也就可以动态地改变。
1
2
3
4
5
6
7
8
9
10
11
12
13
14
15
16
17
18
19
20
21
| (function () {
function initRem() {
const styleNode = document.createElement("style"),
clientWidth = document.documentElement.clientWidth,
clientHeight = document.documentElement.clientHeight,
screenRatio = clientWidth / clientHeight,
screenRatioByDesign = 16 / 9,
fontSize = (
screenRatio > screenRatioByDesign
? (screenRatioByDesign / screenRatio)
: 1
) * clientWidth / 16;
styleNode.innerHTML = "html{font-size:" + fontSize + "px!important}";
document.head.appendChild(styleNode);
}
initRem()
window.onresize = initRem
})(window, document)
|
详细参考:数据大屏rem适配方案_个人文章 - SegmentFault 思否
上面代码按设计稿16/9计算的,可以安装vscode插件帮助转换rem
基准font-size大小 = 1920 / 16 = 120
所以按标准的16/9,填120就可以了
scale 缩放适配
第一步先给要缩放的元素添加css
1
2
3
| body{
transform-origin:left top;
}
|
然后插入脚本到html里
1
2
3
4
5
6
7
8
9
10
11
12
13
14
15
16
17
18
19
20
21
22
23
24
25
26
27
28
29
| function screenScale(element) {
let width = 1920,
height = 1080,
offsetWidth = window.innerWidth,
offsetHeight = window.innerHeight,
scaleX = offsetWidth / width,
scaleY = offsetHeight / height,
top = (offsetHeight - height * scaleY) / 2,
left = (offsetWidth - width * scaleX) / 2;
const transform = `translate(${left}px,${top}px) scale(${scaleY},${scaleX})`;
element.width(width);
element.height(height);
element.css({ transform: transform });
}
function resize() {
screenScale($("body"));
}
window.addEventListener("DOMContentLoaded", resize);
window.onresize = resize;
|
这种方法简单,宽高按照设计稿写死就完了,反正有scale适配
但是可能会有些插件对像素位置不太兼容,因为计算的是translate之前的,或者其他原因。
比如我用 nicescorll 的时候,滚动条位置错位了,最后写死left,反正元素大小固定了。
图片自适应写法 垂直padding
之前写图片自适应总是外边包一层宽高写死,里面img标签自适应,需要调整的我再用媒体查询去改。
发现一种自适应的写法,不用手动适配了哈哈哈。
原理:
width写百分比,但height不能写百分比,因为css计算宽度由外向内,高度由内向外,只有内部高度去撑开外部的高度,给子元素height写百分比将导致悖论。
但是,垂直padding百分比是根据父元素宽度计算的!所以高度写百分比的话,只需要根据父元素宽度去换算就可以了。
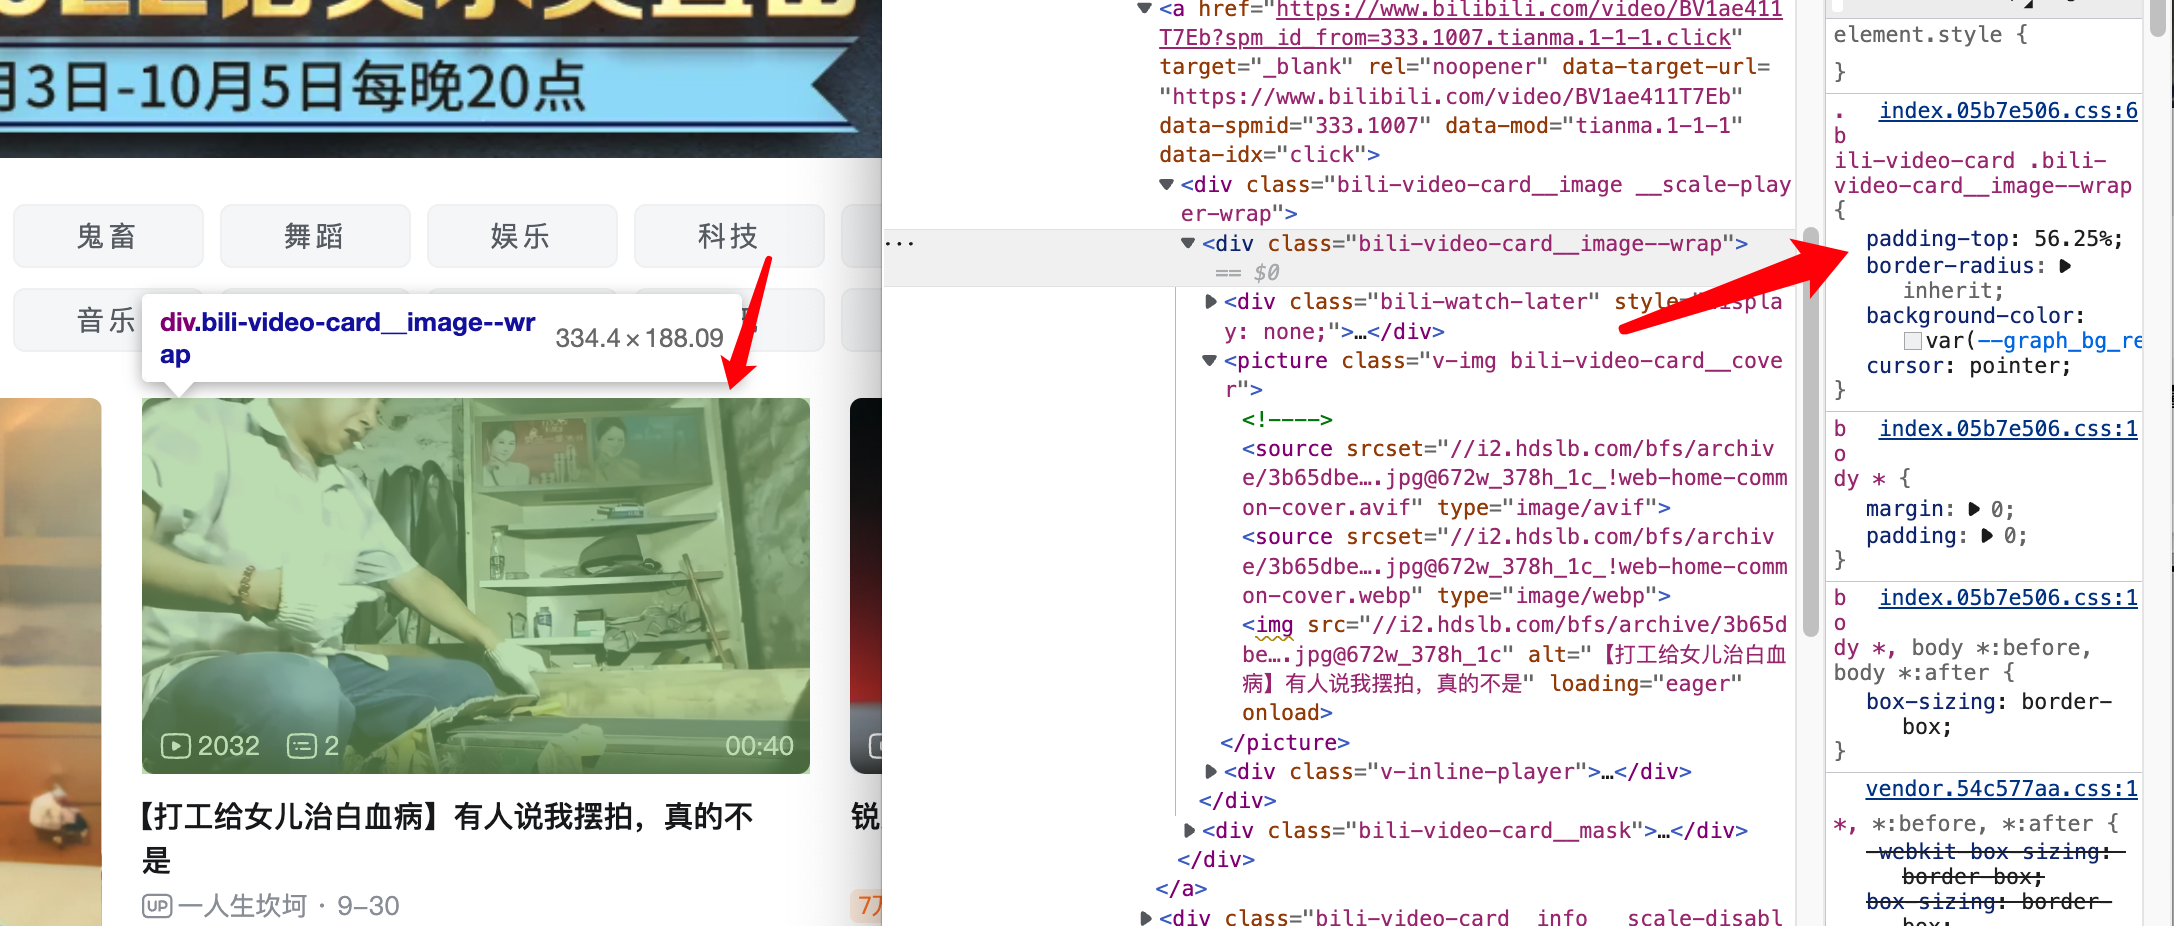
发现b站首页视频缩略图也是使用的这种方法
![image-20221004132605994 image]()
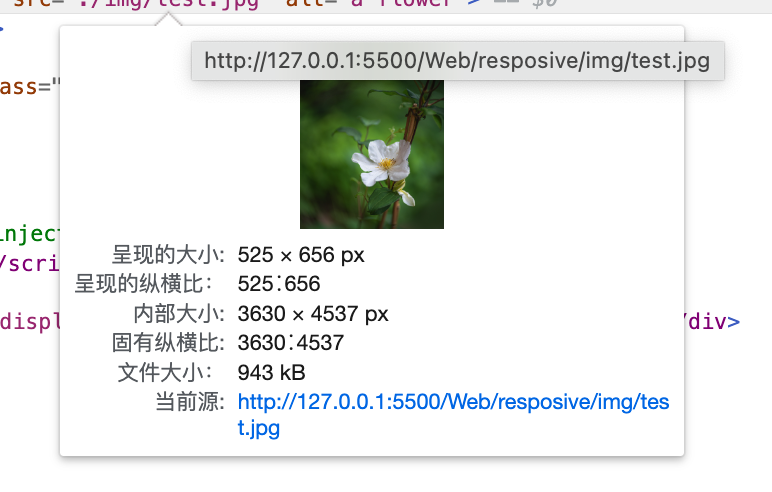
计算方法:图片高度除以宽度!
比如
![image-20221004150406832 image]()
此时padding-top: 124.9%
img-wrap 宽度写100%,然后再套一层写宽度,这样方便计算!
在线示例:https://jsrun.net/hUEKp
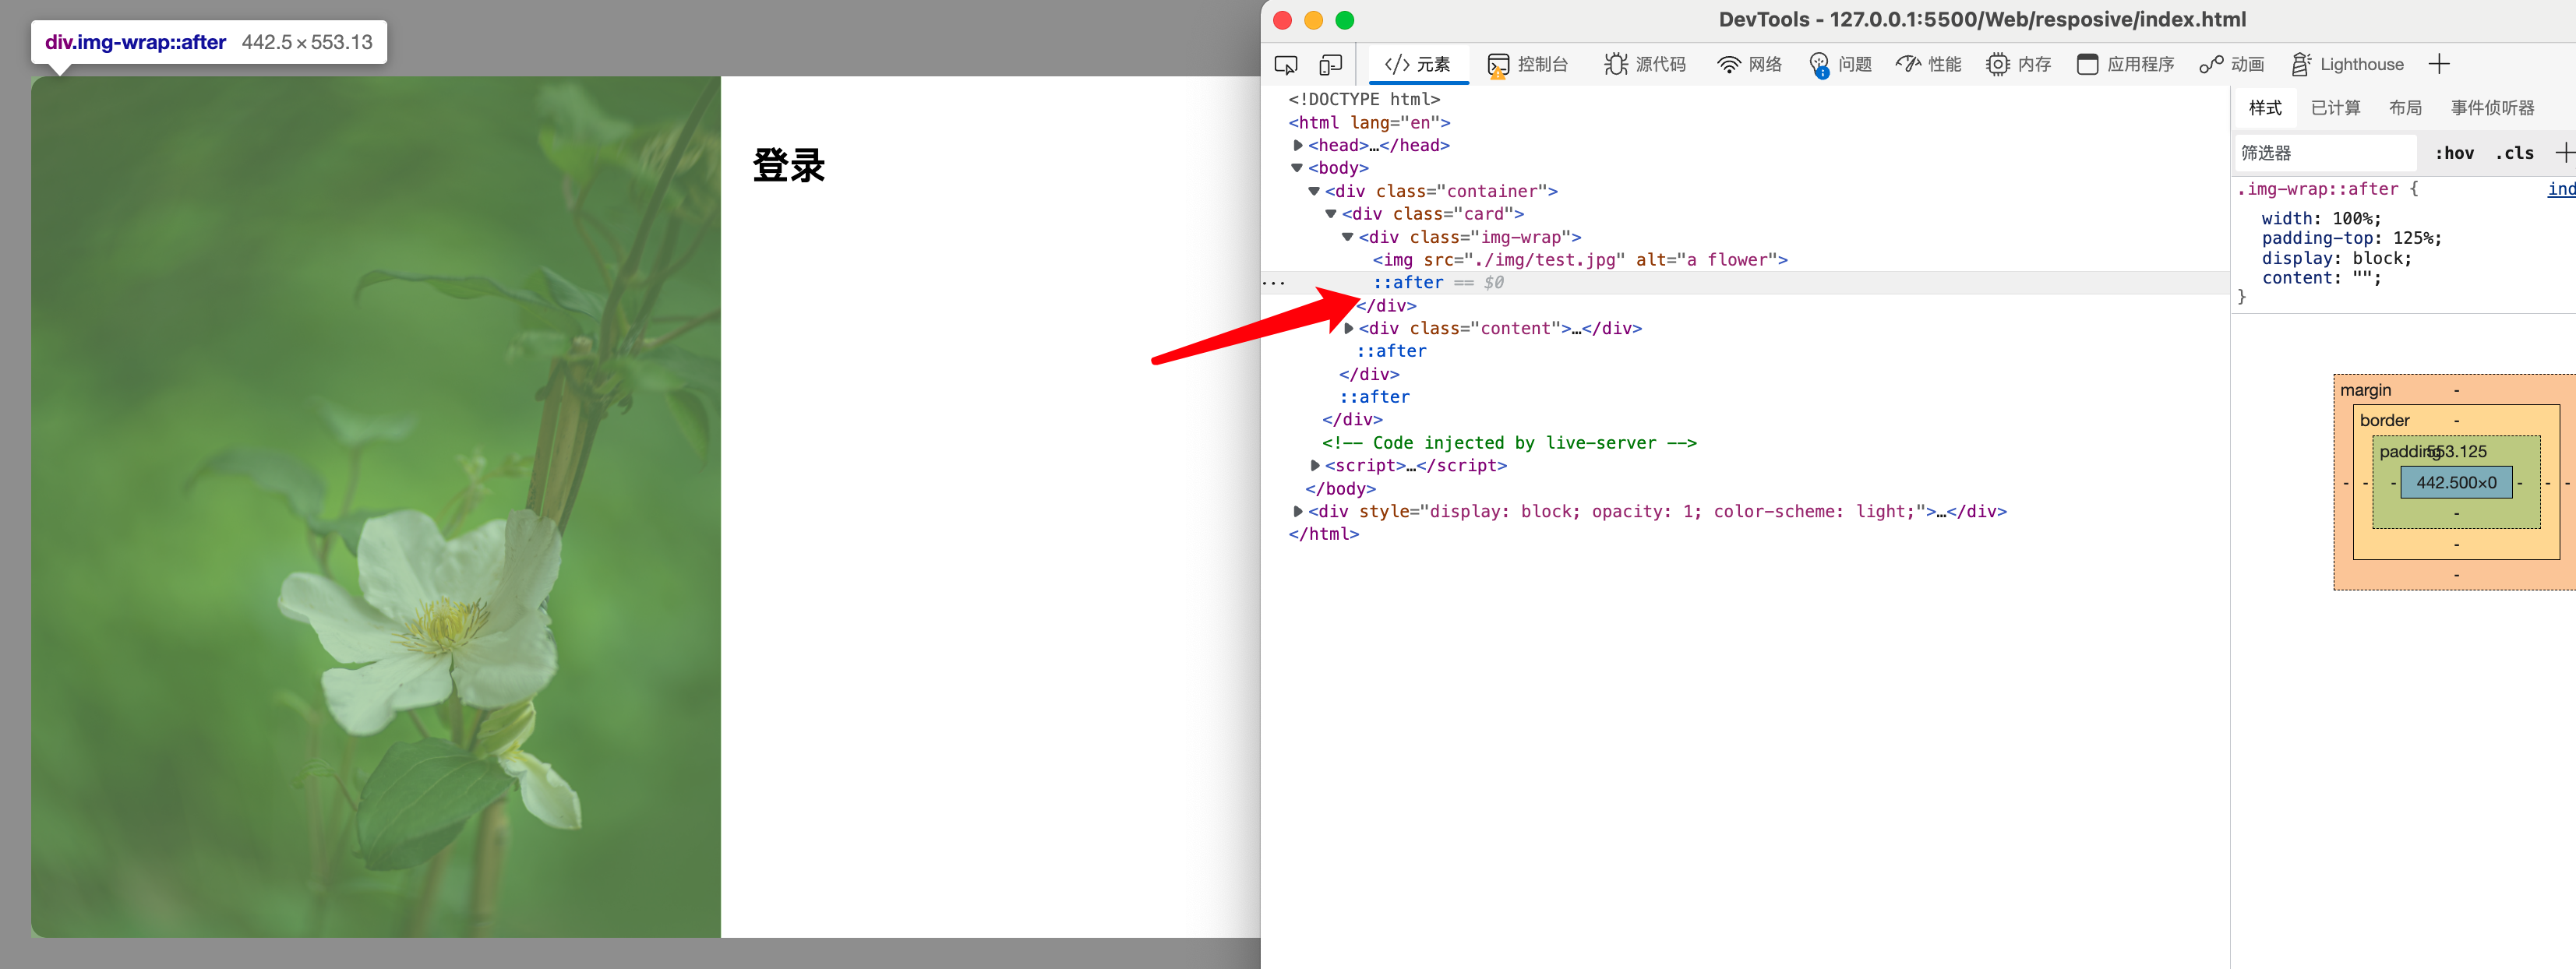
html层级太多了,也可以这么写,用伪元素撑开大小
![image-20221004151932299 image]()
附图片自适应关键代码:
1
2
3
4
5
6
7
8
| <div class="card">
<div class="img-wrap">
<img src="./img/test.jpg" alt="a flower" >
</div>
<div class="content">
<h2>登录</h2>
</div>
</div>
|
1
2
3
4
5
6
7
8
9
10
11
12
13
14
15
16
17
18
19
20
21
22
23
24
25
26
27
| .card {
height: 100%;
width: 60%;
min-width: 800px;
}
.img-wrap {
width: 50%;
float: left;
position: relative;
}
.img-wrap::after {
width: 100%;
padding-top: 125%;
display: block;
content: "";
}
.img-wrap img {
position: absolute;
height: auto;
max-width: 100%;
left: 0;
top: 0;
bottom: 0;
right: 0
}
|


